SOUTH SIDE ROUTES
APPROACH

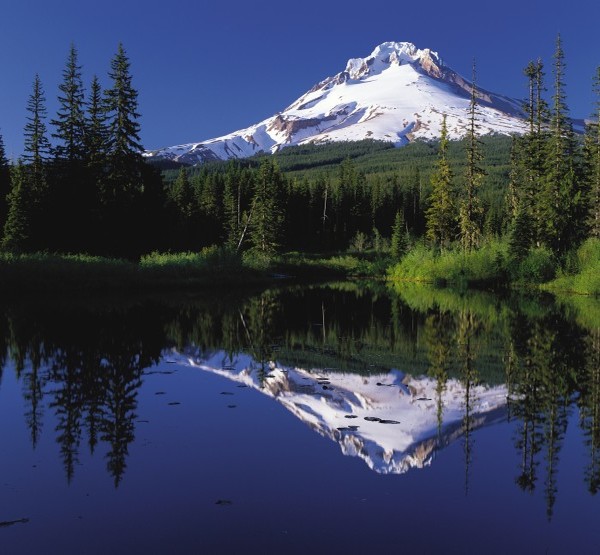
Mt. Hood from the South
From Timberline Lodge (5,924 ft.), head north across the parking lot, climb the snow bank and make your way to climber’s right of the ski boundary. There are often stakes with surveyor’s tap marking the boundary, otherwise there is a well-worn path that will be easy to find. This path will be your highway until you reach the top of the Timberline Ski Area (Palmer Lift House). If visibility is poor climb under the Magic Mile Ski Lift, located 100 yards west of the Timberline Lodge.
Silcox Warming Hut (7,016 ft.) is approximately 1000 ft. above Timberline and a nice place to take your first break. The interior of Silcox won’t be available during your climb, but the building itself offers a good windbreak. The same is true of all the lift houses; they merely provide a landmark and a bit of protection, don’t depend on any of these for shelter. If you’re on the main climbing trail the hut will be about 100 yards to climber’s left, if you’re under the lifts you’ll run into the Magic Mile Lift House, Silcox is a 100 feet to climber’s right. From Silcox continue to climb either on the main climber’s trail, or following the lift if visibility is still poor.
The next stop is usually the top of the Palmer Snow Field (8,540 ft.), like Silcox the building makes a great wind break. If weather is poor, visibility is low and you’re unfamiliar with the terrain you should go no higher than the Palmer. If you are able to follow the ski lifts you can make it to this point with relative safety, however, above the Palmer you will be relying on navigation and be dealing with increased danger of crevasses, rock/ice fall or avalanches.
Climber’s continuing on should move to climber’s left so that you are continuing from directly above the Palmer Lift House. This provides some degree of security of crevasses that creep over from the top of White River Canyon later in the season. Head north toward Crater Rock from the lift house.

From Crater Rock Facing North
As you approach Crater Rock you’ll want to gain the Hogsback by traversing the eastern (climber’s right) base of Crater Rock. Some sources suggest the western side of Crater Rock as a variation on this route, however over the last few seasons this has been a popular path for large landslides and avalanches. The eastern side is more protected and fairly reliable. As you come around Crater Rock the Hogsback is the obvious ridge of snow that links Crater Rock to the summit rim. Where the Hogsback begins is the perfect spot to put on crampons (if you haven’t done so yet) and take a brief break. When you stop make sure you’re out from the base of Crater Rock, by now the sun will be rising and rock fall is common.
Most conditioned climbers can reach Crater Rock safely in good weather, regardless of experience or ability. Beyond Crater Rock is the “crux” of the climb. Here all members of a team should be familiar with the use of crampons and ice axes, know how to self-arrest, be comfortable with crevasse rescue techniques and know how to travel on a rope team. Experience, assessment of the condtions/terrain and good judgment will tell you if traveling on a rope team is necessary. If you don’t have these skills you have no business going further without a guide or experienced team with you!
From the Hogsback there are two main variations of the traditional south side climb of Mt. Hood: Old Chute and the Pearly Gates. Each has been referred to as the primary route by one source or another, with the other listed as a variation. Conditions dictate which route is best. Some years we’ve seen the Pearly Gates fill in with snow/ice, creating a 20 foot vertical wall that most casual climbers are unprepared for. Other years the Hogsback moves over and creates a low angle ramp directly through the Pearly Gates. It just depends.
THE PEARLY GATES

From Crater Rock Facing The Pearly Gates
The most direct route to the summit from Crater Rock is the Pearly Gates. Follow the Hogsback toward the summit rim. Don’t go too far up the Hogsback as the buttress between Pearly Gates and Old Chute is one of the first to shed rock in the morning. Once you’ve passed Devil’s Kitchen (the fumaroles on climber’s right) move to climber’s right and skirt between the Bergschrund and Devil’s Kitchen Headwall. Depending on conditions there may be other crevasses to be cautious of, but you’ll definitely have to contend with the Bergschrund on your left and the headwall on your right (which is prone to rock fall).
In years when the Hogsback has shifted east the Bergschrund can come very close to Devil’s Kitchen Headwall in the later season when the Bergschrund is open. In these conditions climbers should move to their left off the Hogsback and around the Bergschrund.The Pearly Gates proper is a Y-shaped chute with a buttress in the middle. This is the steepest (30 to 40 degrees) section of the entire climb, and has the most danger of rock and ice fall. Move quickly and carefully, stay spaced out so as not to endanger other climbers. Following the largest of the two chutes will put you a few hundred feet from the summit. Approach the summit carefully as there is frequently a large cornice that builds up on the north side of the summit rim, particularly in early spring.
THE OLD CHUTE
If the Pearly Gates are in poor condition, the Old Chute may be your best bet. From December until late April or mid May, when this area is more prone to avalanches, follow the Hogsback toward the summit rim until you near the Bergschrund. Before you reach the Bergschrund, drop off the Hogsback to climber’s left. Continue carefully up and to your left, probing for the end of the Bergschrund until you pass it. Continue up and to the left of the prominent rock buttress and through the Old Chute. By staying higher on the route and hugging the buttress above the Bergschrund you avoid spending time in a potential slide path, and in early season the buttress is less likely to shed rock or ice on to you.

From The Old Chute Facing South Toward Crater Rock
Later in the season, when avalanche danger is low and your biggest threat is rock and ice fall, leave the Hogsback as soon as you can, passing over the area known as Hot Rocks (climbers left of Hogsback). Hot Rocks is directly north of Crater Rock and consists of two active fumaroles, the area between them is often covered with snow, but even if it is not you can cross with little danger. The fumaroles offer a bit of warmth and it’s a tempting spot to put on crampons, warm up, camp or establish an emergency shelter. DO NOT LINGER ON OR NEAR THE FUMAROLES, sulphur gas released from the vents can deplete the oxygen in the area. Moving steadily ensures no danger of suffocation. Once you’ve negotiated Hot Rocks, move up and through the Old Chute. In low snow years, or late in the season a second Bergschrund has been known to appear, so be careful of crevasses.
As you top out on the Old Chute be careful, the north face is a few feet in front of you. It’s best to begin following the summit ridge to the right as soon as you are able to, in order to avoid falling off the north side. Follow the ridge to climbers right, sometimes a bulge of snow and ice forms between the top of the Old Chute and the summit. This is usually located a few dozen feet from the top of the chute. This often is no more than a larger than normal step down, but sometimes it necessitates a bit of down climbing. Once this is behind you continue up towards the summit. You will have to drop 30-50 feet down into a small saddle where the west chute of the Pearly Gates tops out, and then continue to the summit! Be careful, especially in early season, of the large cornice that builds up and over the north side, some years it looms as far out as 40 feet.

Looking North, Up The Old Chute
DESCENT
We strongly recommend descending whichever route you ascended, this way you are familiar with the conditions, obstacles, landmarks and route. If this is not possible due to weather, route conditions, other climbers or some other danger, try to descend the other South Side Route. If your are not equipped or prepared for a descent ask for help from other climbers. If weather or route conditions make it unsafe to descend, build an emergency shelter and call for help. If you are unable to call for help, hunker down and wait, a friend or family member should initiate your emergency plan.
Once safely back at Crater Rock your challenge isn’t always done. The descent of Mt. Hood in low visibility (or if you aren’t paying attention) can be deadly. If visibility is poor the tendency of a climber is to follow the fall line, which will lead to either White River Canyon or Mississippi Headwall. In either case the result is a fall of several hundred feet off a cliff. If you are unable to see a fixed landmark such as the Palmer Lift House, Silcox, or Timberline Lodge use a compass to take a magnetic south bearing, this will lead you toward the ski area and eventually Timberline Lodge. It’s best to use the compass as soon as visibility lessens and you loose sight of your destination.